
Last updated November 14, 2026
 Metal roofing
 Architectural shingles
 Tile roofing
 GAF
 Owens Corning
 Flat & low-slope
Free roof inspection with deck photos before we talk money - GAF and Owens Corning certified installation
Roofing Emergency Preparedness Guide for Rochester Homes
Most homeowners think a roofing emergency is the moment water comes through the ceiling. It usually isn’t. The real emergency window opens the day before the water arrives, and it closes fast once the calls start piling up. During the worst lake-effect events, every roofing contractor in Monroe County tends to fall 10 to 14 days behind within a day, so the response you get depends less on who you call and more on what you’ve already done. This guide covers the parts a contractor can’t do for you: the first four hours of interior triage, safe temporary weatherproofing in wind and snow, and the documentation that decides whether your claim gets paid. It’s written for Rochester homes and the winters Rochester actually delivers.
Quick Answer
A roof emergency in Rochester is managed in layers: contain the interior water first, document everything before you touch anything, then tarp safely if conditions allow. The goal in the first four hours is to limit damage and create a record, not to get a permanent repair done. Permanent work waits for safe conditions and a free written estimate from a roofing professional.
Styles & brands we work with
- Architectural shingles
- Metal roofing
- Tile roofing
- GAF
- Owens Corning
- Flat & low-slope
Table of Contents
- What to do in the first four hours of a roof emergency
- Interior triage: managing an active leak from inside
- Insurance documentation: what to capture before cleanup
- Temporary exterior weatherproofing that holds in wind and snow
- How to file an emergency claim with a New York carrier
- Building a roofing emergency kit before storm season
- Ice dams and lake-effect wind: Rochester’s winter roofing risks
- Common mistakes to avoid
What to do in the first four hours of a roof emergency
The first four hours are about control, not repair. What you do in that window decides how much of the house gets wet and how strong your claim looks when an adjuster reviews it. Work through these steps in order and don’t skip ahead to the roof itself.
- Stop the flow into the house. Move furniture, electronics, and anything with fabric away from the leak path. Place buckets and bins under drips and lay down old towels or plastic sheeting.
- Photograph before you touch anything. Capture the wet ceiling, the floor beneath it, and any damaged belongings while the evidence is untouched.
- Take a video walkthrough. A slow, continuous phone video of each affected room, narrated out loud with the time and where you’re standing, is one of the most useful records you can hand an adjuster.
- Relieve pressure safely if a ceiling bubbles. Details in the section below.
- Check the attic if it’s safe to enter. Look for wet insulation, staining on the underside of the deck, and any water tracking along rafters. Photograph it.
- Write down what happened. Date, approximate time you noticed the leak, weather conditions, and where water is appearing. Keep this log going for the life of the claim.
- Call and schedule the free estimate. Call (855) 473-8654. We answer 24/7. Fast dispatch from 7am to 7pm, Sunday through Friday.
One thing worth repeating: do not climb the roof in an active storm. Wet shingles, snow cover, and wind are a serious fall risk, and no tarp is worth an injury. Interior work and documentation come first every time.
Interior triage: managing an active leak from inside
Most of the damage in a roof leak happens inside the house, not on the roof, because water pools in the ceiling cavity and finds its way into drywall, insulation, and framing before you realize it’s there. Interior triage buys you time and limits the spread.
Where to place containment
Put buckets directly under the drip, not on the spot where water is spreading across the ceiling. Water travels along drywall toward the lowest point, so the visible drip is often several feet from the actual entry. If you can, follow the staining to the source and place a container there too. Line buckets with a plastic trash bag so you can carry them out without spilling, and empty them before they’re full, since a heavy bucket is easy to kick over.
Relieving a bubbling ceiling, safely
A ceiling that sags and bubbles is holding trapped water, and the pressure will spread the damage. To relieve it without a collapse risk, don’t punch or stab at the bulge from below. Instead, place a large container underneath, then use a small nail or awl to make a pinhole at the lowest point of the bulge from a safe standing position, and let the water drain into the container. If the ceiling is actively sagging or the drywall sounds soft, keep people out of the room and call a professional before touching it. Water-soaked drywall can fail suddenly.
Protect the rest of the room
- Move electronics, artwork, and rugs away from the leak path.
- Pull back furniture and lay down plastic sheeting or towels to catch splashes.
- Open windows or run a fan if humidity is climbing, but keep the wet area contained.
- Turn off power to any ceiling fixture directly under the leak at the breaker if water is reaching it.
If the leak is in the attic and you can safely access it, use plastic sheeting to channel water toward a bucket or out to a soffit vent so it doesn’t soak the insulation.
Insurance documentation: what to capture before cleanup
Photographs taken before a single towel goes down or tarp goes up carry the most weight in a claim. Adjusters want to see the loss before it was mitigated, the timeline, and the scope. Capture it in this order.
- Overall shots first. Wide photos of each affected room showing water, staining, and pooling.
- Close-ups next. Detail shots of the wet ceiling, damaged belongings, sagging drywall, and any visible exterior damage.
- Timestamps. Most phone cameras stamp automatically, but also write the date and time in your notes. If your camera doesn’t timestamp, note file names against a written log.
- A narrated video walkthrough. Slow, continuous, with commentary. This is the single most useful document you’ll create.
- The evidence of cause. If a branch punctured the roof or wind lifted shingles, photograph the exterior from the ground with a zoom lens. Don’t climb up.
- Every receipt. Keep receipts for tarps, buckets, fans, dehumidifiers, and any temporary repairs. Mitigation costs are typically reimbursable under most homeowner’s policies.
- Your written log. Weather conditions, what you noticed and when, and every person you spoke with and what they said.
Back up all photos and video to the cloud before any cleanup starts. Once you’re calling for a free estimate, a clear record makes the conversation faster and gives us a more accurate picture of what happened. It’s also the strongest position you can be in when your carrier’s adjuster arrives.
Temporary exterior weatherproofing that holds in wind and snow
Tarps are meant only to reduce further water intrusion until a proper repair can happen. Done wrong, a tarp can cause more damage than the leak and create a serious fall risk. Done right, it buys the roof time.
When to tarp and when to wait
Wait if you can. Heavy snow, ice, high wind, or an active storm are not tarp conditions, and neither is any time the roof surface is wet. Snow-covered shingles are dangerously slick, and in freezing temperatures, a wet ladder becomes a hazard. If a professional can’t be on the roof safely, don’t be there yourself.
Anchor methods that work in wind
- Lay the tarp so water runs downhill with the slope, with at least a two-foot overhang past the damaged area.
- Drive fasteners through wooden battens or furring strips laid over the tarp, not directly through the tarp and into the deck, which creates new holes and leaves the tarp rattling in wind.
- Use weighted edges or ropes secured to non-moving anchor points rather than tying to gutter edges, which can tear off under load.
- Keep the tarp pitched to shed water and prevent ponding, which adds weight.
- Remember that tarps are temporary. They degrade and flap in lake-effect wind, and every one of them should be replaced by a proper repair.
How to file an emergency claim with a New York carrier
Filing quickly matters, but filing accurately matters more. Before you call your carrier, have your documentation organized: your photos, your video, your written log, and receipts for any mitigation purchases. Then work through this sequence.
- Call your carrier’s claims line and report the loss. Have your policy number and date of loss ready. Ask whether your policy has an emergency mitigation provision, and ask what documentation they want in the initial report.
- Report the full scope, not just the visible damage. Mention interior water intrusion, wet insulation, damage to belongings, and any safety concerns in the same call.
- Ask about temporary repairs. Most homeowner’s policies include coverage for reasonable steps to prevent further damage, such as tarps and temporary stabilization, with receipts. Ask specifically what your policy covers and keep every receipt.
- Schedule the adjuster and keep a log. Write down who you spoke with, when, and what they said. Your contractor’s written estimate supports the scope claim the adjuster sees.
- Keep mitigation separate from permanent repair. Know which costs are emergency mitigation and which are the actual repair, because your carrier will treat them differently.
If the estimate is free and the claim is moving forward, a written line-item estimate from Valor Roof Repair can be submitted to your carrier to support the scope of work. Estimates are always free, and the written estimate sets the final price, so you’re not guessing while the adjuster is involved.
Building a roofing emergency kit before storm season
A kit assembled when the weather is calm is worth ten kits assembled in the dark during a storm. For a roughly 2,000-square-foot Rochester home with a typical roof footprint, here’s what to have on hand, sized appropriately.
- Tarps: two heavy-duty woven tarps, at least 20×30 feet, rated for rain and UV. One to deploy, one to replace it if it tears.
- Wooden battens: a half-dozen 1×2 wooden strips, 8 feet long, to anchor the tarp without driving fasteners through shingles.
- Fasteners: a box of galvanized roofing nails or cap fasteners and a hand stapler for quick edge work.
- Buckets and bins: at least four buckets, plus one large plastic bin, with trash bag liners.
- Plastic sheeting and towels: one 6-mil roll of plastic sheeting for interior containment, plus a bundle of old towels.
- Fans and a dehumidifier: one box fan and one dehumidifier to start drying wet areas.
- Lighting: two rechargeable flashlights and spare batteries, since power can go.
- Gloves, eye protection, and a non-slip ladder: for access you can do safely from the ground or a stable ladder, never on an active roof.
- A documentation pouch: a waterproof folder or Ziploc bag for your paper log and receipts.
Unlike other home emergencies, this is a kit you assemble once and forget until it’s needed. Store it in a garage or basement near a ground-level access point so you’re not hauling it up stairs in a storm.
Ice dams and lake-effect wind: Rochester’s winter roofing risks
Rochester roofing emergencies rarely look like the storms people picture. They’re slower and quieter. Warm air escaping through the attic melts snow on the upper roof, water runs down to the cold eave, and refreezes into ice. That ice backs up under shingles, finds a seam, and starts dripping inside, often days after a storm has passed. The same weather pattern that brings lake-effect snow also brings wind strong enough to lift shingles and expose the underlayment, especially on roofs with age or a compromised sealant line.
Two winter signals worth acting on:
- Icicles and thick ice along the eave point to a backup risk. Don’t climb up to chip it off, since that’s a serious fall hazard and can damage shingles. Call a professional for an assessment of the roof and attic.
- Wind-lifted or missing shingles exposed after a storm need temporary protection quickly, before the next snow or melt cycle pours water in.
Rochester’s older neighborhoods, with their varied rooflines and mature tree cover, tend to see the same issues recur: branch punctures, wind-lifted sections, and ice dam breaches. If any of those describe your situation, a free roof inspection is the honest first step, and it tells you whether you’re looking at a targeted roof repair or a roof replacement. We inspect it honestly, then tell you exactly what it needs, repair or replace, nothing more. Our technicians have up to 10 years of experience, and we work with materials from GAF, CertainTeed, Owens Corning, IKO, Atlas, Tamko, and Boral, giving us real options rather than a single brand pushed at you.
Common Mistakes to Avoid
- Climbing the roof in an active storm. Snow, ice, and wet shingles are a serious fall risk, and no tarp is worth an injury. Limit your exterior work to what’s safe from the ground or a stable ladder, and leave the roof to a professional.
- Cleaning up before documenting. If you empty the buckets and throw out the towels before you photograph the scene, you’ve destroyed the evidence your claim depends on. Capture it first.
- Letting a tarp flap in wind. A tarp that isn’t anchored with battens will thrash and tear at neighboring shingles, turning a small repair into a bigger one and leaving the damage unprotected when the storm passes.
- Chipping ice off the eave. This is a common instinct in Rochester winters, and it’s a recipe for a fall or a damaged shingle. Leave the ice to a professional who can assess the roof and attic.
- Reporting a partial loss. If you only mention the visible interior damage and skip the wet insulation and belongings, the adjuster’s scope comes in short. Report everything you found.
- Throwing out receipts for mitigation. Tarps, fans, dehumidifiers, and buckets are typically reimbursable, but only if you have the receipt. Keep a folder.
- Assuming the leak is the only problem. Water travels. The spot where it drips on your ceiling is rarely directly under the roof breach. Have the whole roof assessed rather than patching one spot.
When to Call a Professional
Call when water is actively coming in, when the ceiling is sagging or bubbling, when the roof is snow-covered and slippery, or when wind has lifted or removed shingles. Also call if you simply can’t tell how serious the damage is, since a free inspection answers that question honestly. We’re a repair-first company: we built our name on repair, because not every damaged roof needs a full replacement, and we’ll tell you plainly which one you need. A roof inspection from Valor Roof Repair is a diagnosis, not a sales pitch, and the written line-item estimate sets the final price. We pull permits where required and stand behind the work. Call (855) 473-8654. We answer 24/7. Fast dispatch from 7am to 7pm, Sunday through Friday. Free estimates for Rochester homes, and for the broader region through Rochester homeowners we work with.
See the difference
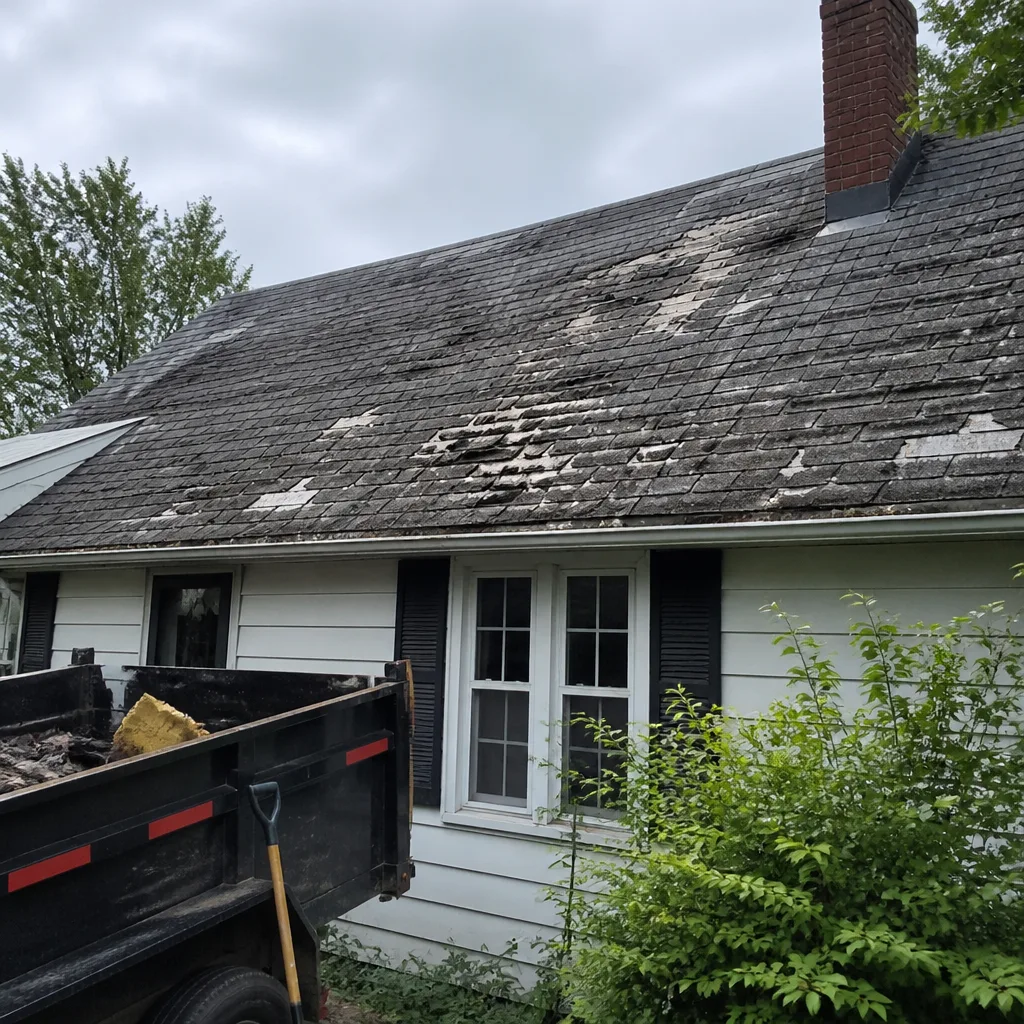 Before
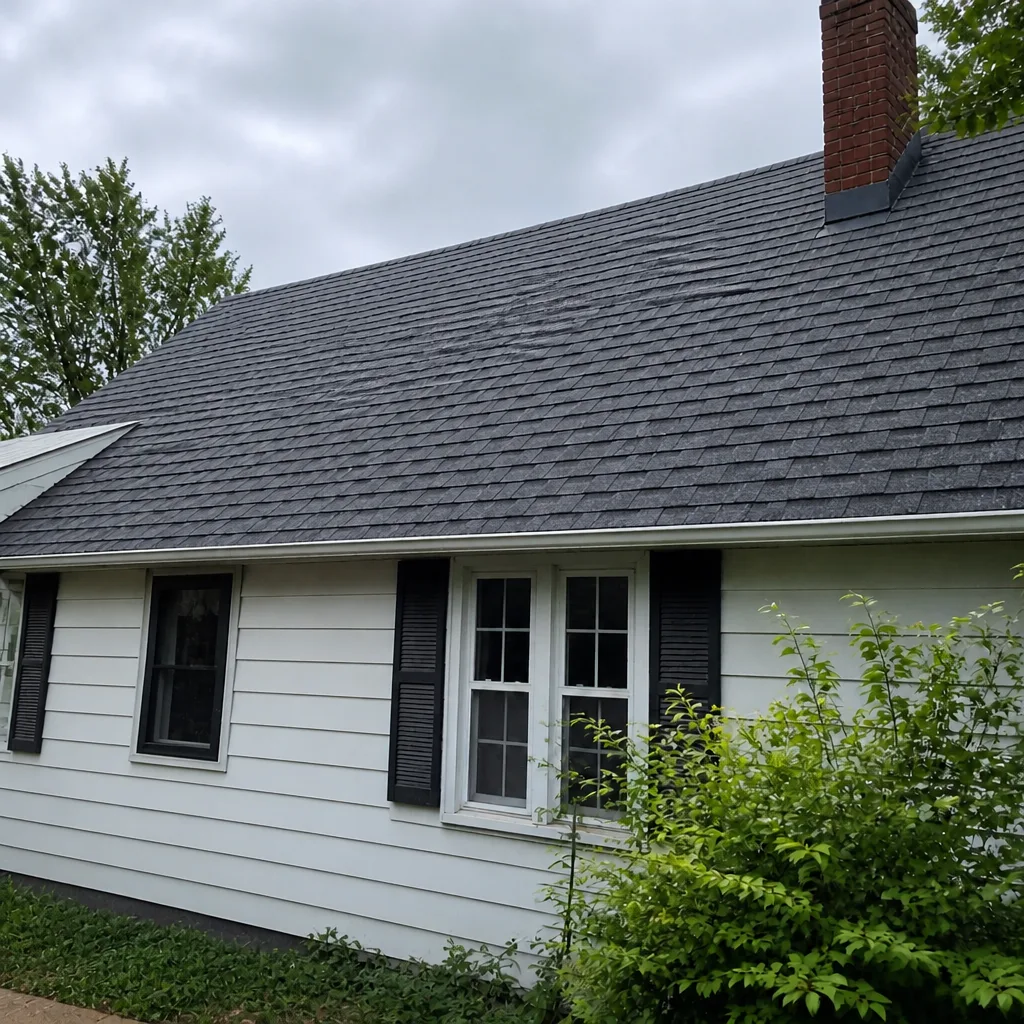 After
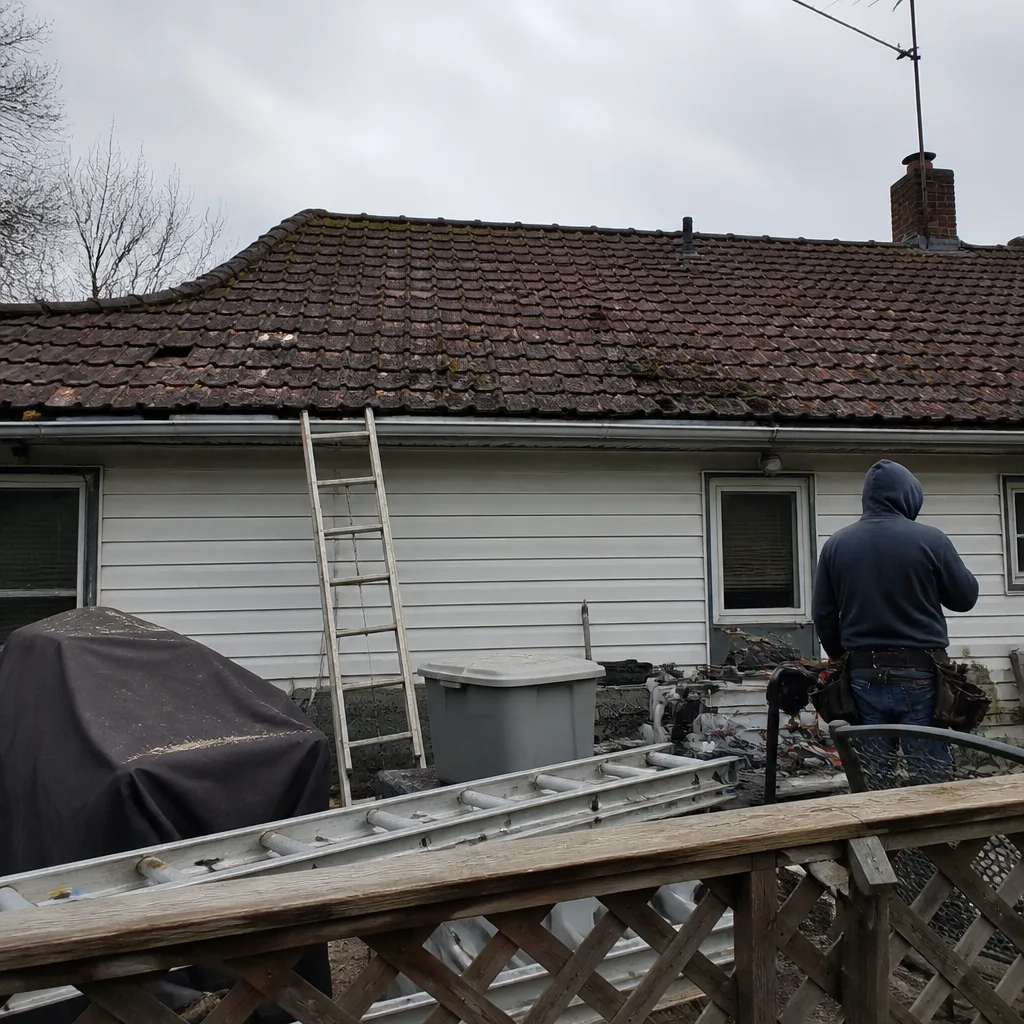 Before
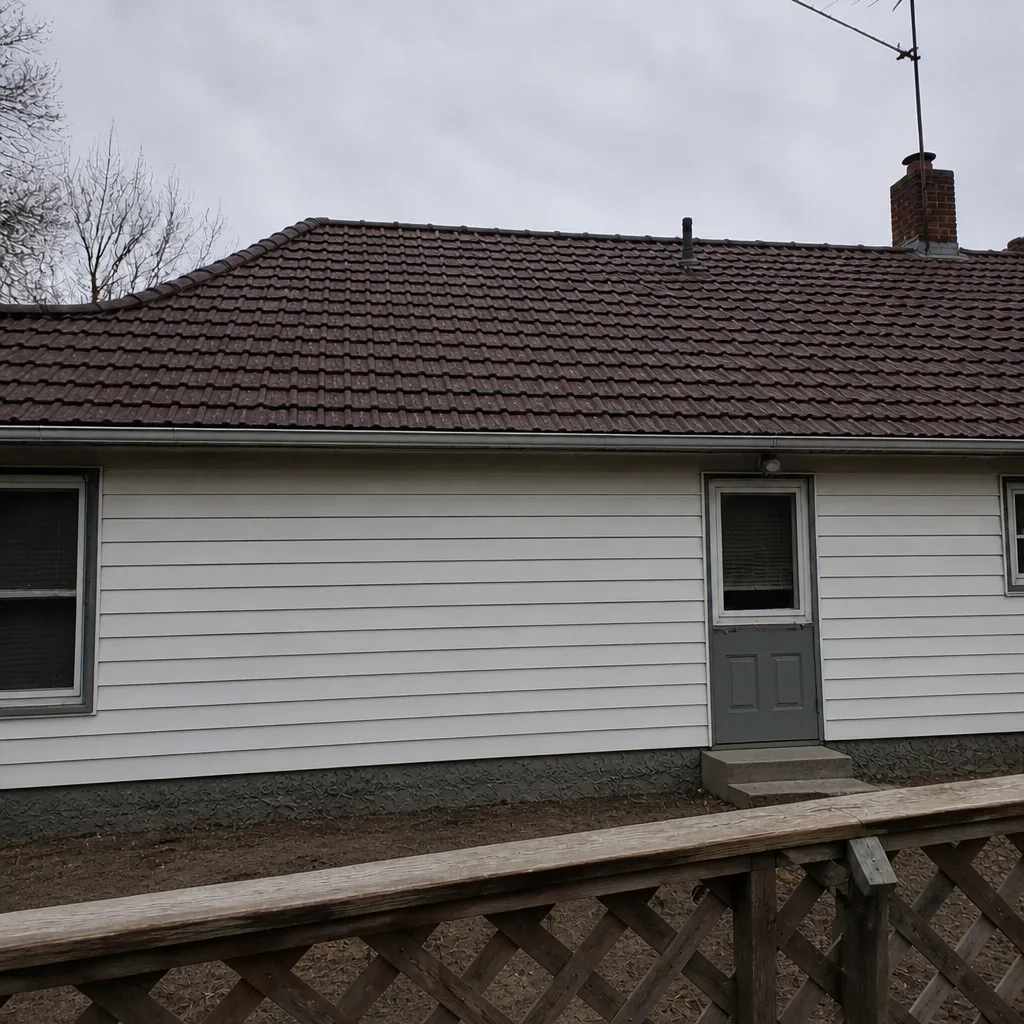 After
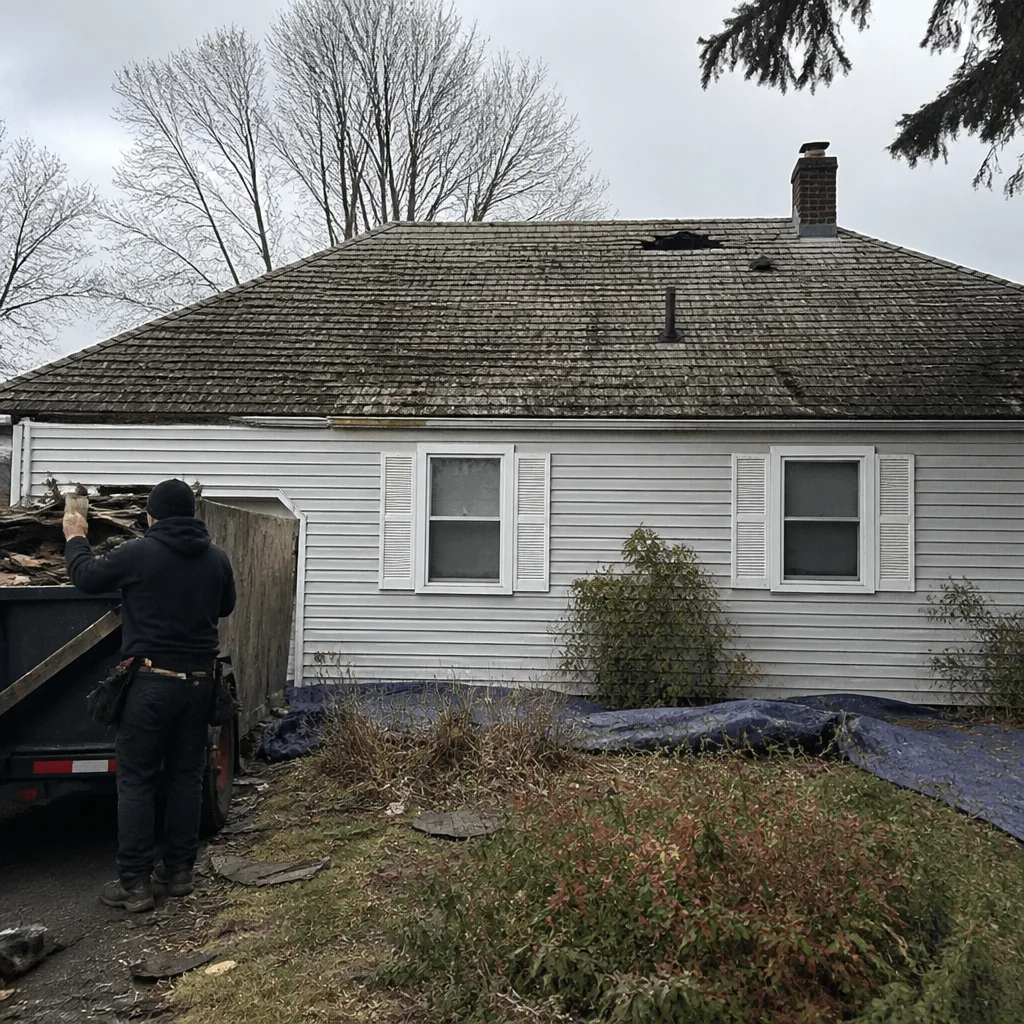 Before
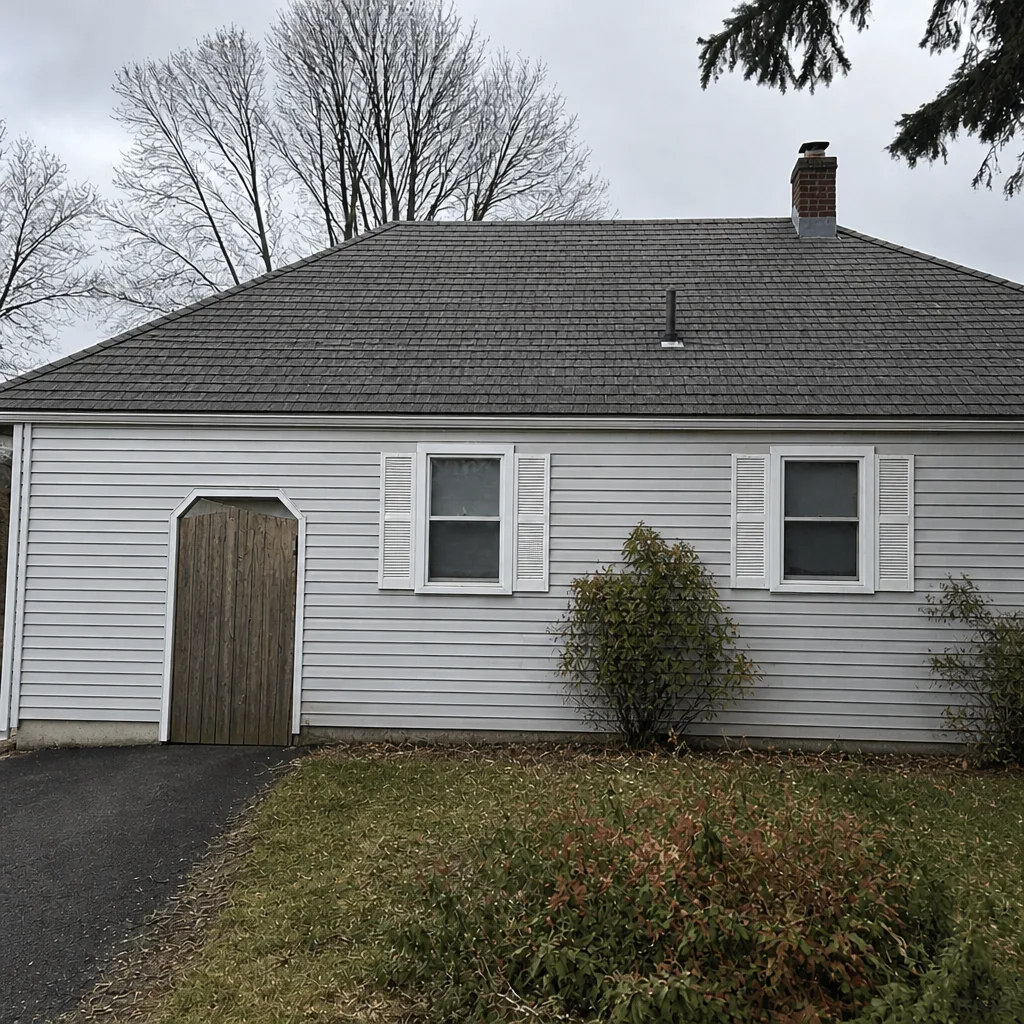 After
Frequently Asked Questions
Contain the water and document it before you touch anything: move belongings, place buckets, photograph the leak and the wet area, then relieve a bubbling ceiling safely with a pinhole from below while keeping people out if it’s sagging. Don’t climb the roof in a storm. Call (855) 473-8654 for a free estimate once the interior is contained.
Only if the roof is dry, the ladder is stable, and the conditions are safe. Snow-covered, icy, or actively wet roofs are not safe for anyone, including you. A professional can assess whether a tarp is needed and, if one is placed, make sure it’s anchored properly so it doesn’t cause secondary damage. Estimates are free, so call us for an honest recommendation.
Most homeowner’s policies include coverage for reasonable steps to prevent further damage after a covered loss, often called emergency mitigation, but check your policy and ask your carrier directly. Keep every receipt for tarps, fans, and dehumidifiers, and photograph everything before cleanup. Call (855) 473-8654 for a free written estimate you can submit to your adjuster.
It comes down to the extent and cause of the damage, the age and condition of the roof, and whether the failure is isolated. A free roof inspection from Valor Roof Repair is a diagnosis, not a sales pitch, and we’ll tell you which is actually needed. We built our name on repair, so we’re not quick to push a replacement when a targeted fix will do the job.
The most common causes are ice dams from warm attic air melting snow that refreezes at the eave, wind-lifted or missing shingles, and punctures from branches. Ice dams and wind exposure are the two that show up most often in Rochester and the surrounding lake-effect region. A free inspection identifies which one you’re dealing with, and estimates are free.
Report it as soon as you’ve contained the leak and captured your documentation, since your carrier may have its own filing timeline. Have your photos, video, written log, and mitigation receipts ready before you make the call. Then call (855) 473-8654 for a free written estimate to support the scope of repair.
The Bottom Line
The first four hours after roof damage decide how much of your home gets soaked and how strong your claim looks. Contain the water inside, document everything before cleanup, tarp only when conditions are safe, and file your claim with your records in hand. Permanent roof work, whether it’s a targeted roof repair or a full roof replacement, comes after the emergency passes and is sized to the actual damage. That’s the Valor approach: inspect honestly, recommend the right scope, and stand behind the job. We work across seven nationally recognized roofing brands, so the material decision is driven by your roof and your budget, not by what’s on a truck. A roof inspection from Valor Roof Repair is a diagnosis, not a sales pitch.
Schedule Your Free Estimate
If you’ve spotted a leak, wind damage, or an ice dam on your Rochester home, call (855) 473-8654 for a free estimate. We answer 24/7. Fast dispatch from 7am to 7pm, Sunday through Friday. We’ll inspect it honestly and tell you exactly what it needs, repair or replace, nothing more.
Written by the team at Valor Roof Repair.